Click E-commerce in the widget panel to create a new widget. You’ll see a Cart button and a pop-up prompting you to connect to your Ecwid or Stripe account. Turn on the corresponding switch: it will turn green if the connection is successful. Move the Cart button wherever you’d like it to appear in the published project.
The Cart button is created globally, so it will appear on all the pages of your project. To remove it from a specific page: select the desired page, open the layers panel, find the Cart widget and click on the eye icon to hide it.
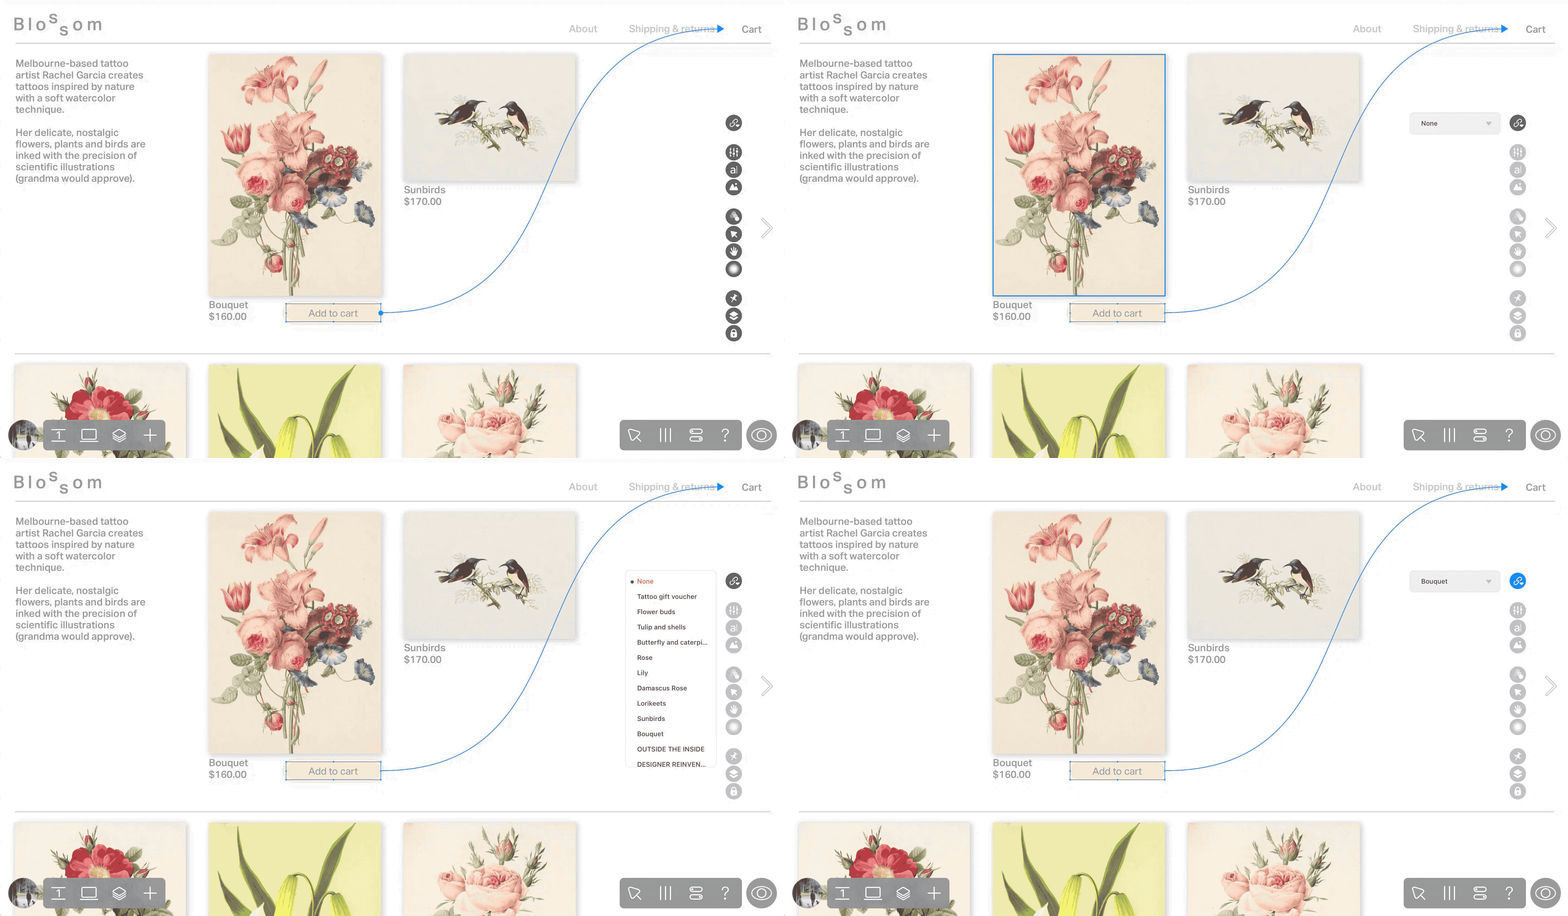
Then click the + button in your widget attributes and select the product you want to add. The Add to Cart button will appear: when your customer clicks on it, the product mapped to this button will appear in the Cart (you can test it in the Preview mode). If your product has any other attributes, they will also be shown above the Add to cart button.

If no products are attached to the Add to cart button, it will be shown with double stroke in the Editor and as ‘No product’ in Preview mode and when published.
Upload an image of your product via the Picture or Slideshow widget and add pricing via the Text widget. Your product card is ready.
To add a new product, create a new E-commerce widget in your layout. It will connect to Ecwid or Stripe automatically.
Customize cart and buttons
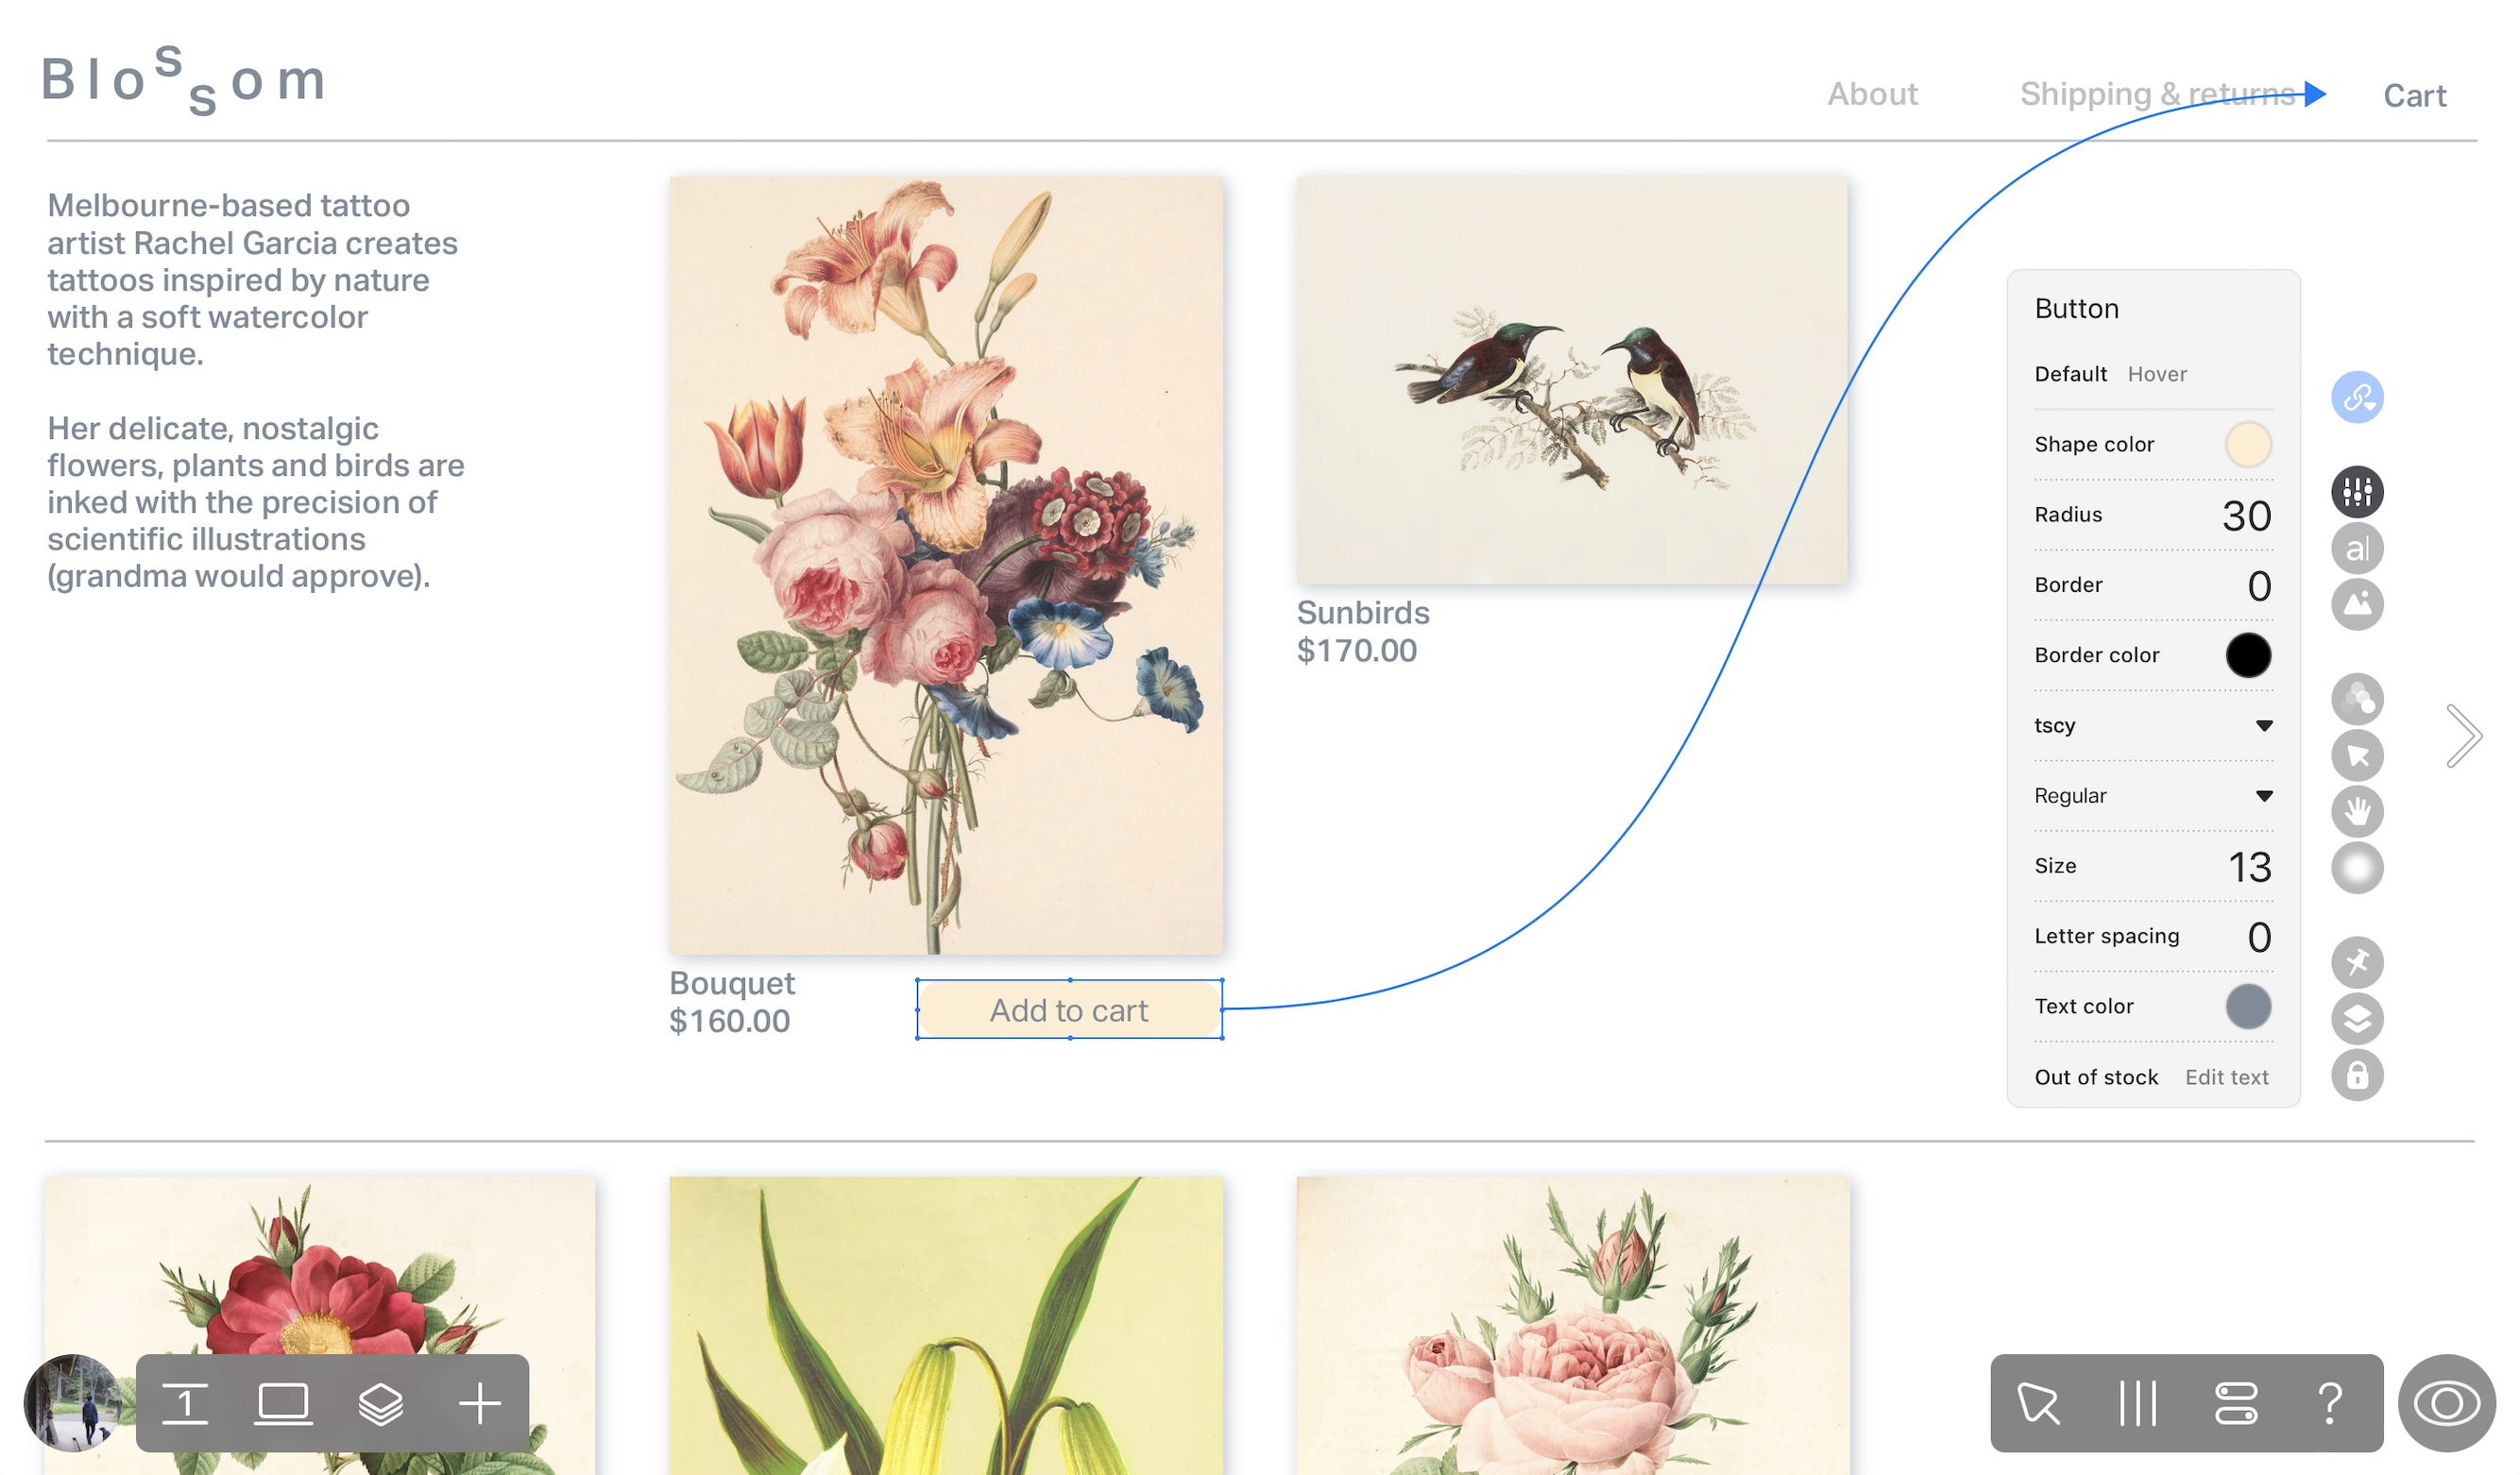
Click Settings in the widget controls to set the preferred color, borders, radius, and font for your ‘Cart’ and ‘Add to cart’ buttons. Both buttons can be customized individually. Click a button you need to edit and go to Settings after that: you’ll see dedicated options for that particular button.

If you want your buttons to change their appearance on hover, switch from Default to the Hover tab, and select the preferred settings.
In the Icon section of the widget controls, you can select from thousands of icons to show it next to your text. Here you can also adjust the size of an icon and position it to the left or right border of your button.
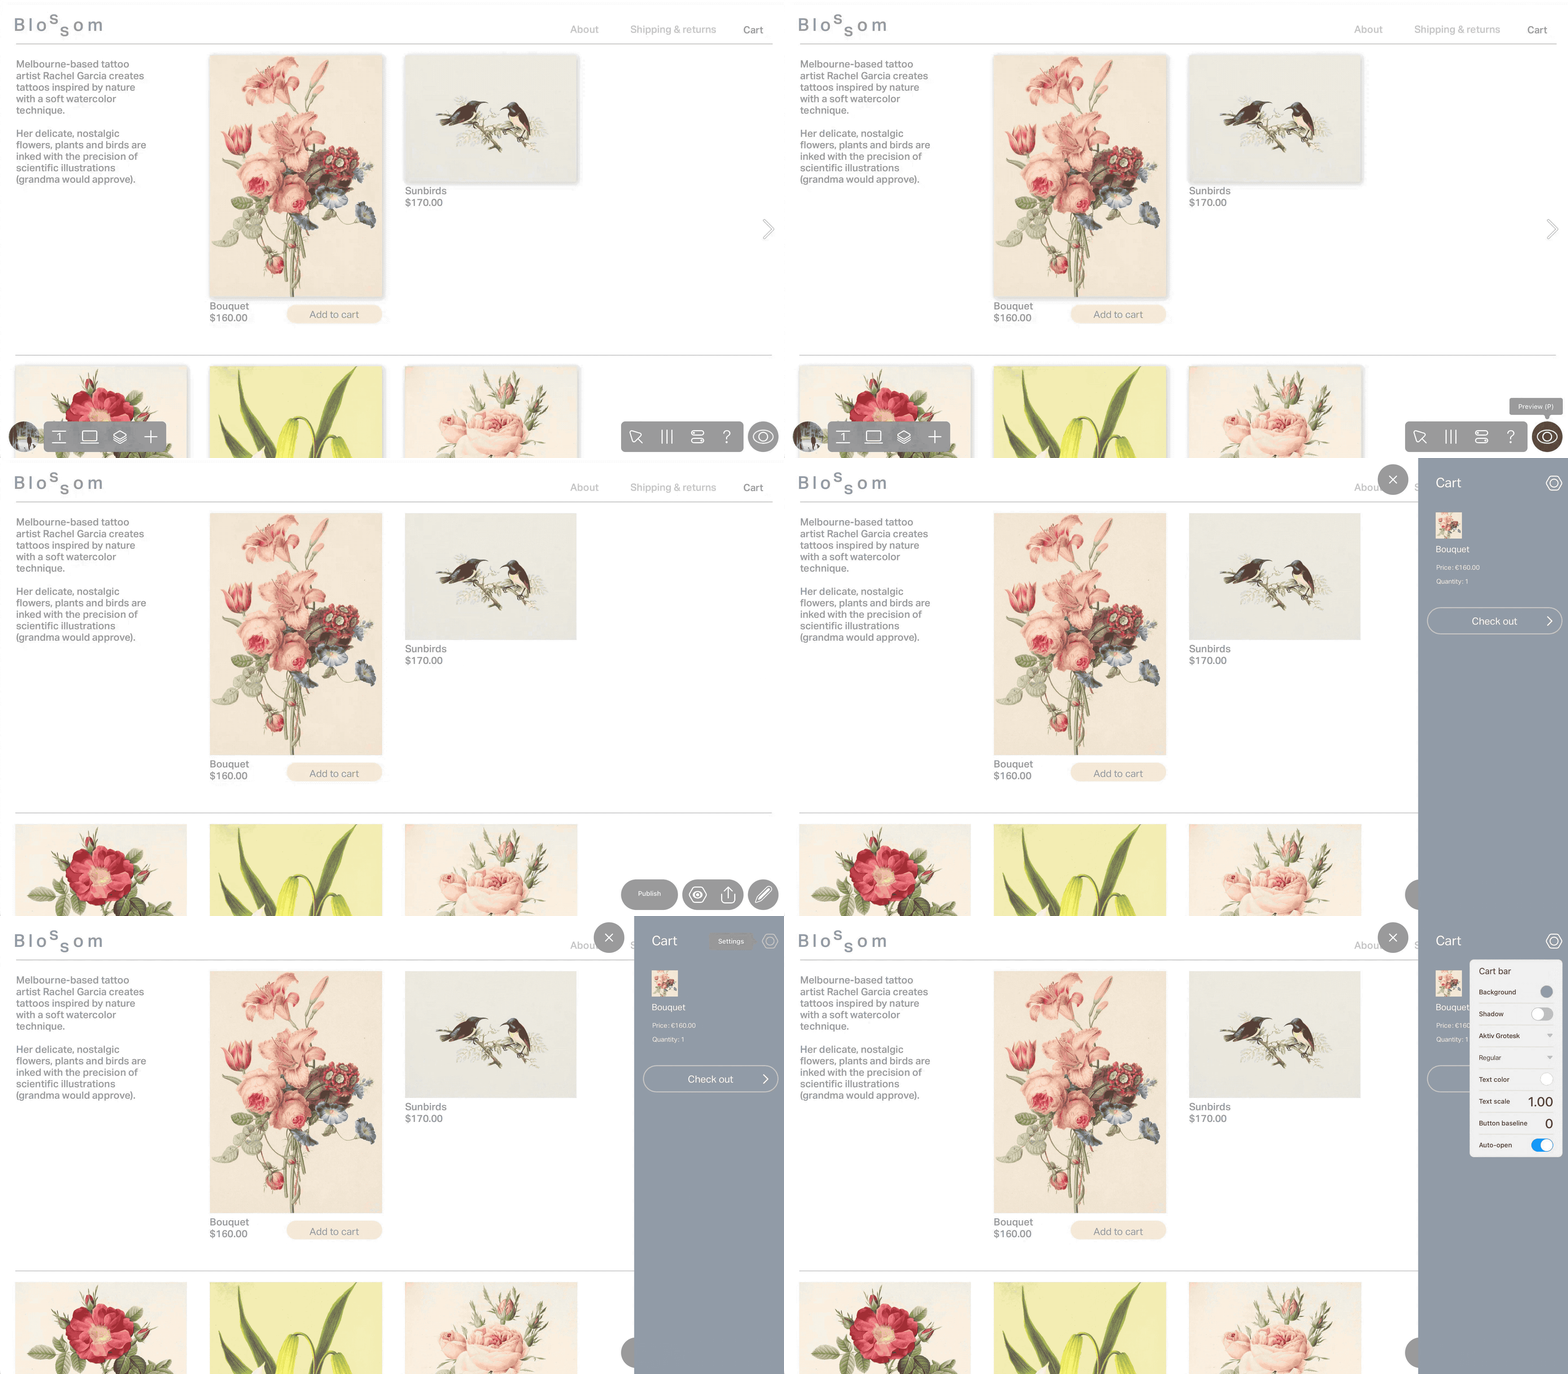
To change the appearance of your shopping cart, enter Preview mode and click the gear icon in the upper-right corner. Here you can control sidebar color and transparency, customize your font, and decide whether you want the cart to display with a shadow.

You can also enable the ‘Auto-open’ option, so the cart will automatically open in the sidebar each time your customer adds a new product.
If you are using Ecwid, you can replace the words ‘Price’ and ‘Quantity’ shown in your cart right from the Readymag editor. To do so, go to the Preview mode, open your cart, click on Price or Quantity, and enter the terms you want to be shown instead.
Customize checkout (for Stripe)
Customize the appearance of the checkout box from your Stripe dashboard: change background, select button colors, etc. To customize, go to your Stripe account settings and select Checkout settings —> Appearance —> Branding settings. Get more details about checkout customization in the official instructions from Stripe.
Follow these steps to add a field where customers can specify their delivery address:
- Set a shipping rate in your Stripe account. To do so, click ‘Products’ in your Stripe dashboard, select ‘Shipping rates’, then click ‘New’. Enter your shipping costs, description, and estimated delivery time.
- Open your project and go to Preview mode, open the Cart, then click on the gear icon in the upper-right corner.
- Copy the ID of the shipping method you created in Stripe and paste it into the ‘Shipping ID’ field.
- Click ‘Available countries’ and select where you want to ship your products by clicking the Plus icon next to them.
To add a promo code field, please take these steps:
- Open your Stripe dashboard, click Products → Coupons → New to create a coupon. Specify an amount or percentage discount for your customers.
- Open your project and go to Preview mode, open the Cart, then click on the gear icon in the upper-right corner.
- Enable ‘Promo code’ in the Stripe section.