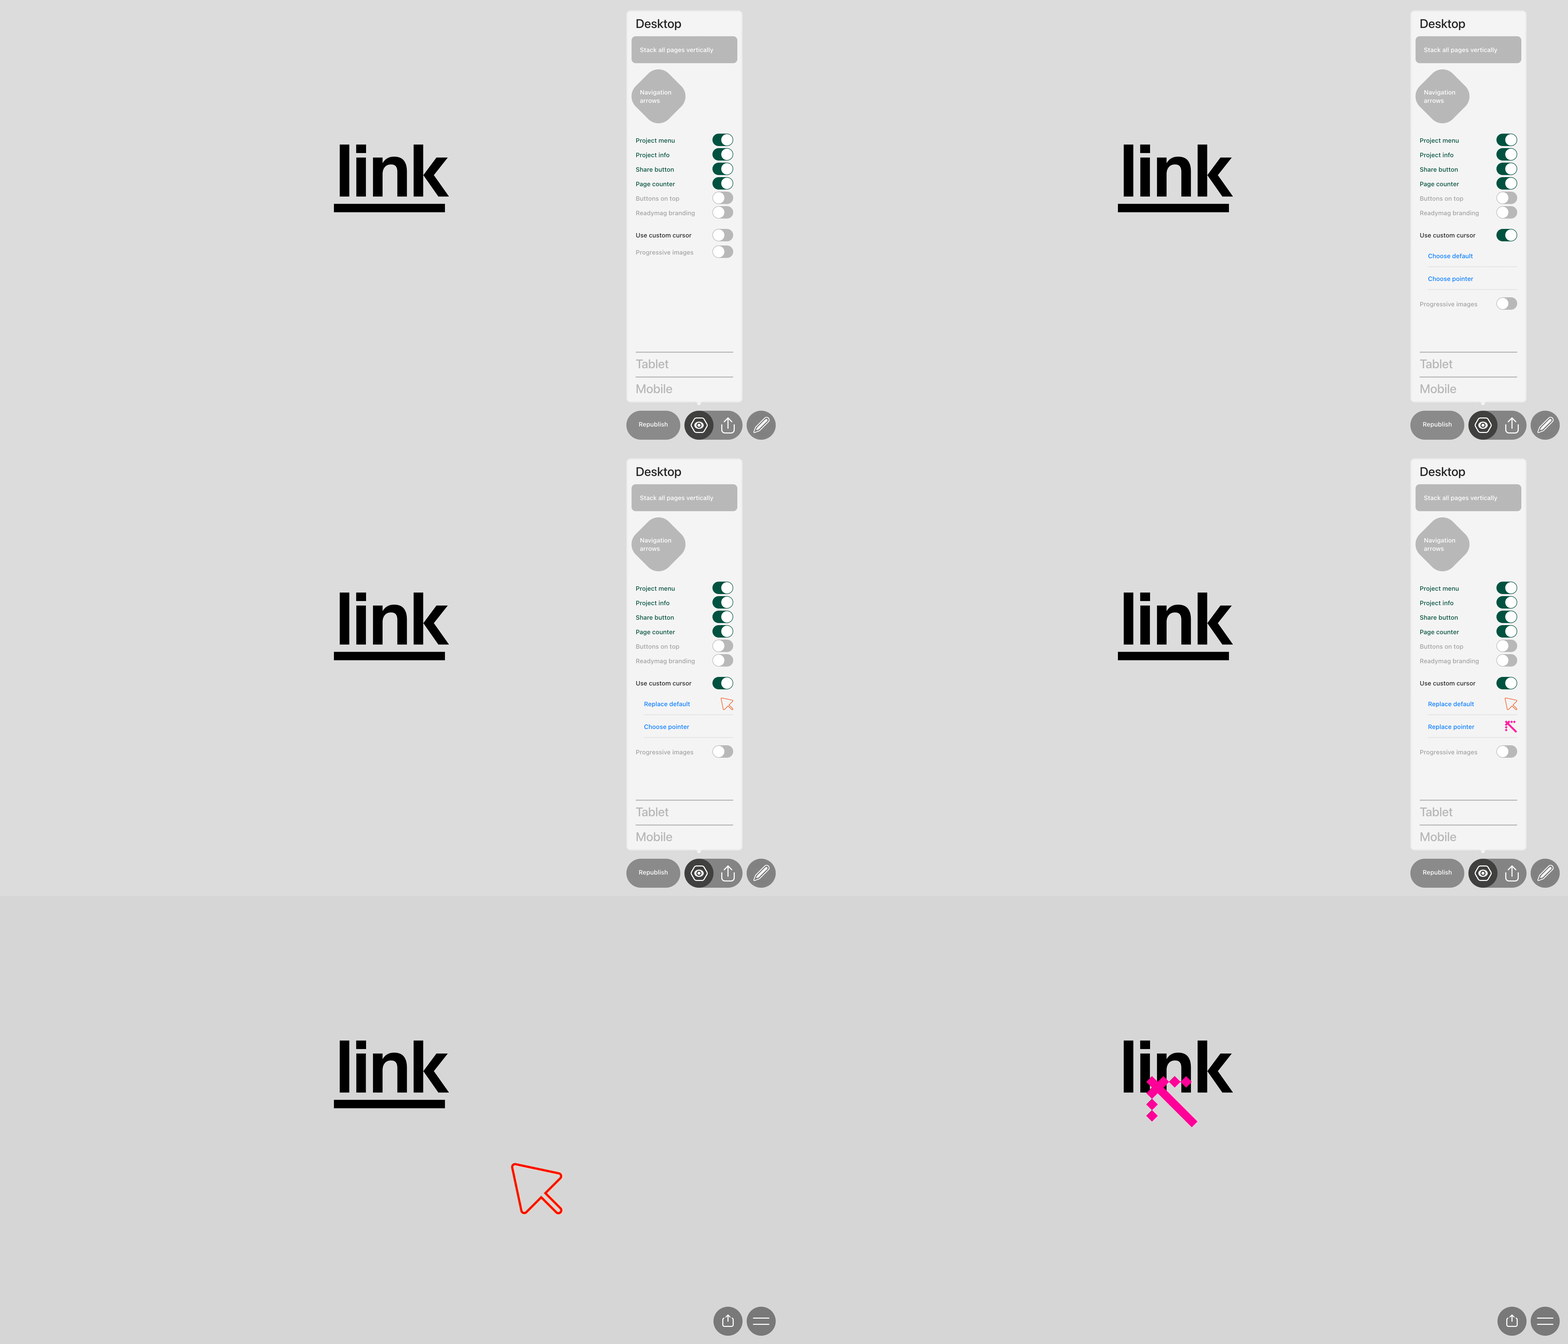
There are two options for using custom cursors in Readymag: for your whole project (the default arrow or pointer cursor will be replaced with a custom icon) and for individual widgets (the cursor will change when hovering over a particular widget).
The two formats can easily be combined: you can set a custom cursor for the entire project, and then another custom cursor for a widget.
To delete an uploaded cursor, go to the Preview mode, and click the gear button.
Requirements
- Custom icons should be uploaded in a PNG or SVG format
- The maximum size for PNG files is 256px (PNG 2x)
- The maximum size for SVG files is 128px
Set a custom cursor for an entire project
Click on the gear icon in the Preview (P) mode → Desktop. Enable the ‘Use custom cursor’ option.

Here you can set custom cursors in two modes:
- Choose default. This will replace the default cursor arrow with your custom icon.
- Choose pointer. This will replace the pointer cursor shown when hovering over clickable elements: links, widgets set as triggers for On Click animations, slideshow controls, etc.
Both modes can be used simultaneously.
Set a custom cursor for individual widgets
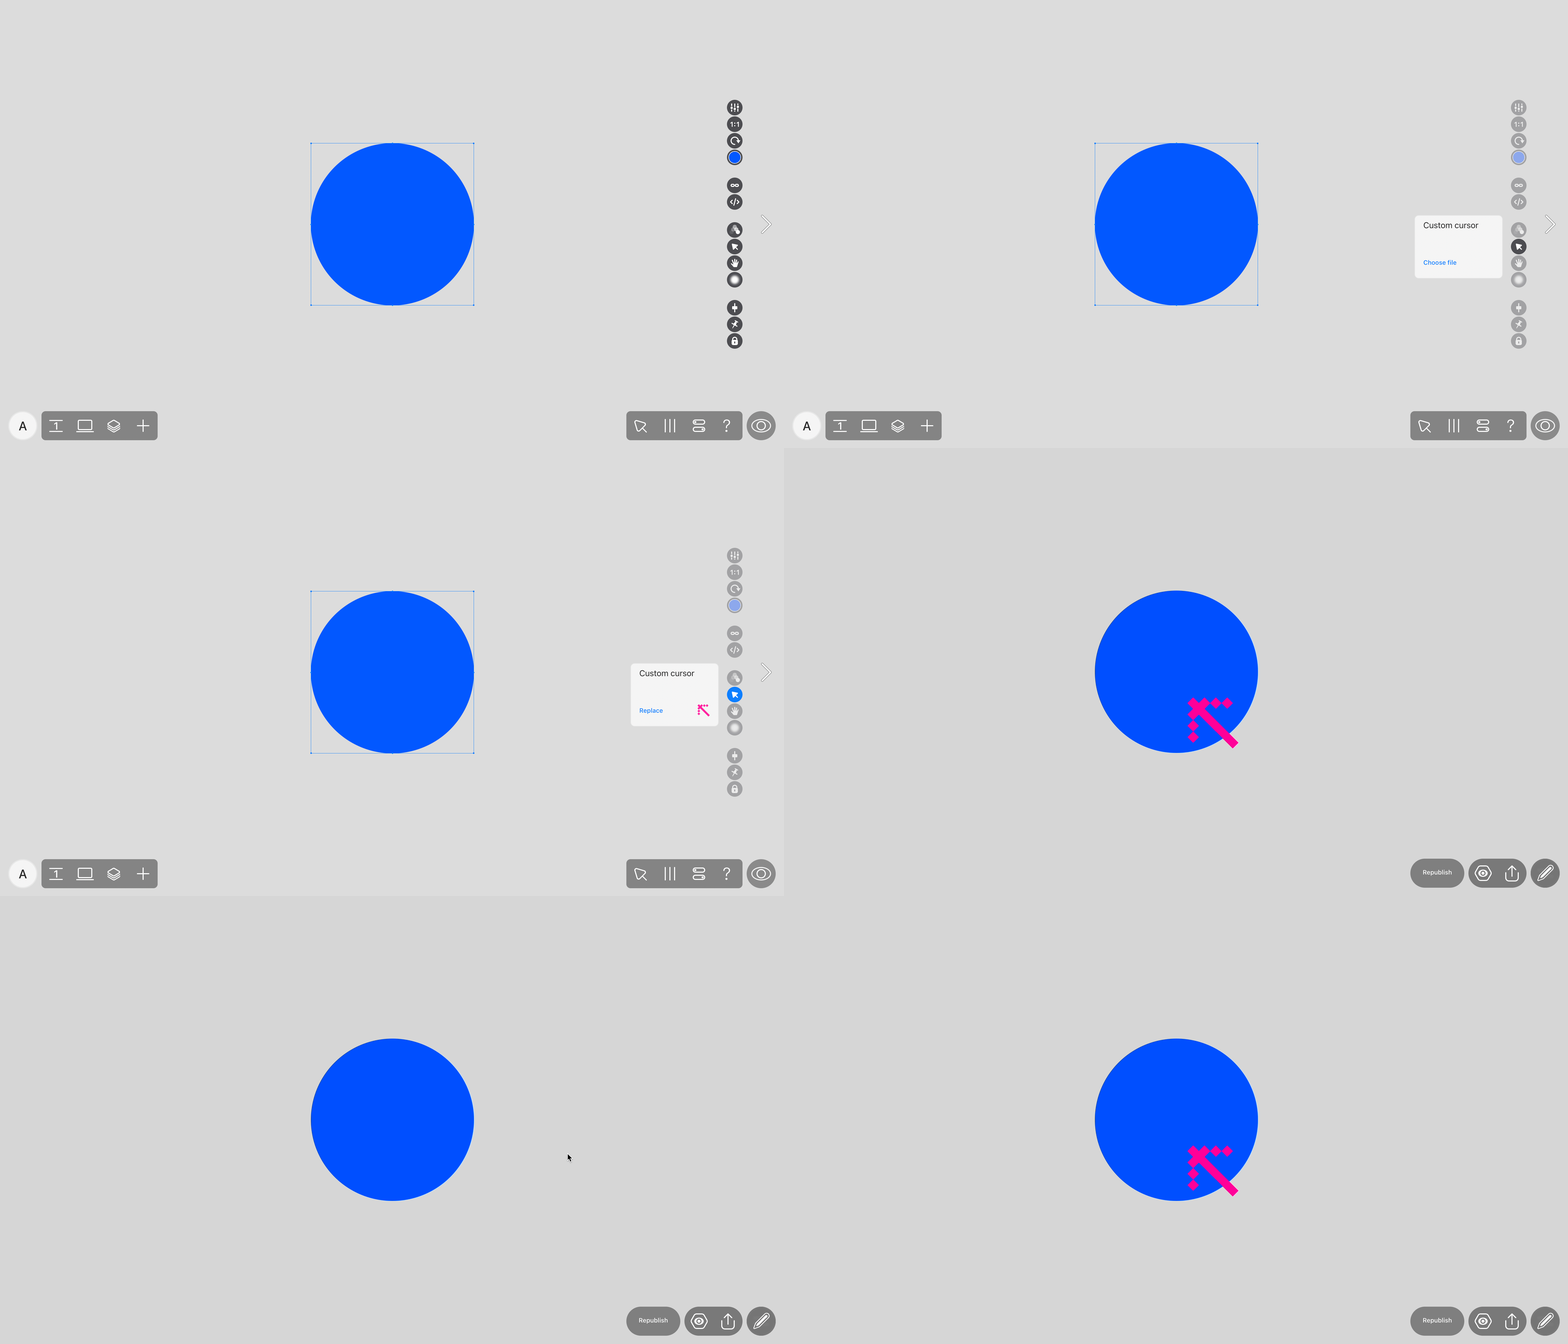
Click on the desired widget and select Custom cursor in its attributes. Here you can upload a custom icon that will be shown when hovering over this widget.

This cursor overrides the cursor set for the rest of the project. If you have set the pointer in your Project settings and a custom cursor for a widget, the latter will be displayed while hovering over the widget.
Custom cursors for Video, Music, and Maps widgets are not supported. To set a custom cursor for multimedia content, embed it via the Code widget without <iframe>. The <iframe> content does not support custom cursors. To learn more about using custom code in Readymag, check this article.